If you’re a Chromebook user looking to explore beyond the basic features, enabling Developer Mode opens up new possibilities. However, it’s important to know the risks and the process for both enabling and disabling this mode. Whether you’re a developer or just curious, this guide will help you understand how to enable and disable Chrome OS Developer Mode step by step.
What is Developer Mode on a Chromebook?
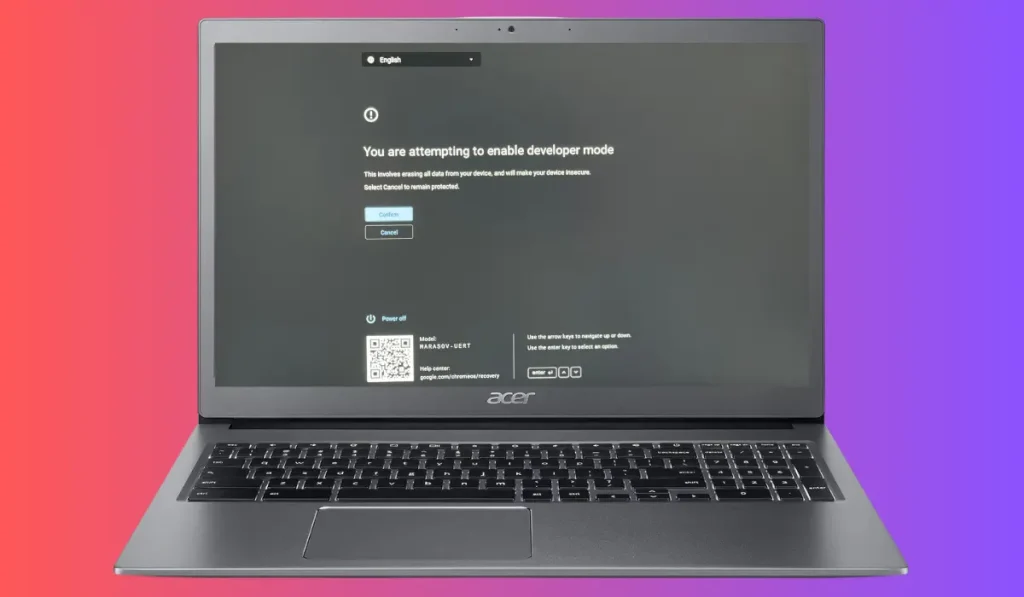
Developer Mode allows users to access deeper system settings and modify their Chromebook in ways that aren’t available in the standard mode. You can install custom software, use Linux-based apps, or even change the entire operating system.
However, enabling Developer Mode also disables certain security features, like OS verification, which makes your Chromebook more vulnerable. That’s why it’s important to understand the pros and cons before making changes.
Why Enable or Disable Developer Mode?
Enabling Developer Mode is great for those who want more control over their Chromebook. It allows:
- Customization: You can install custom software or apps not available in the Chrome Web Store.
- Development: Developers can test apps or work with advanced system features.
- Linux Support: Allows running Linux apps and systems.
On the flip side, disabling Developer Mode might be better if:
- You want your Chromebook to be more secure.
- You no longer need advanced features and prefer a smoother, worry-free experience.
- You’re tired of the warning screens that appear when using Developer Mode.
Now that we’ve covered why you might want to disable it, let’s get into the steps to remove Developer Mode from your Chromebook.
How to Enable Developer Mode on a Chromebook
If you’re ready to enable Developer Mode, here’s how:
Step 1: Back Up Your Data
Enabling Developer Mode will wipe all data on your Chromebook. Before proceeding, make sure to back up any important files to Google Drive or an external storage device.
Step 2: Enter Recovery Mode
- Turn off your Chromebook.
- Press and hold the Esc key, Refresh key, and then press the Power button.
- Release the keys when you see the Recovery Mode screen, which asks you to insert a recovery USB stick (you don’t need to do that).
Step 3: Enable Developer Mode
1. Press Ctrl + D on your keyboard to enter the Developer Mode settings. Alternatively, you can use the arrow keys to scroll down to Advanced Options and select Developer Mode.
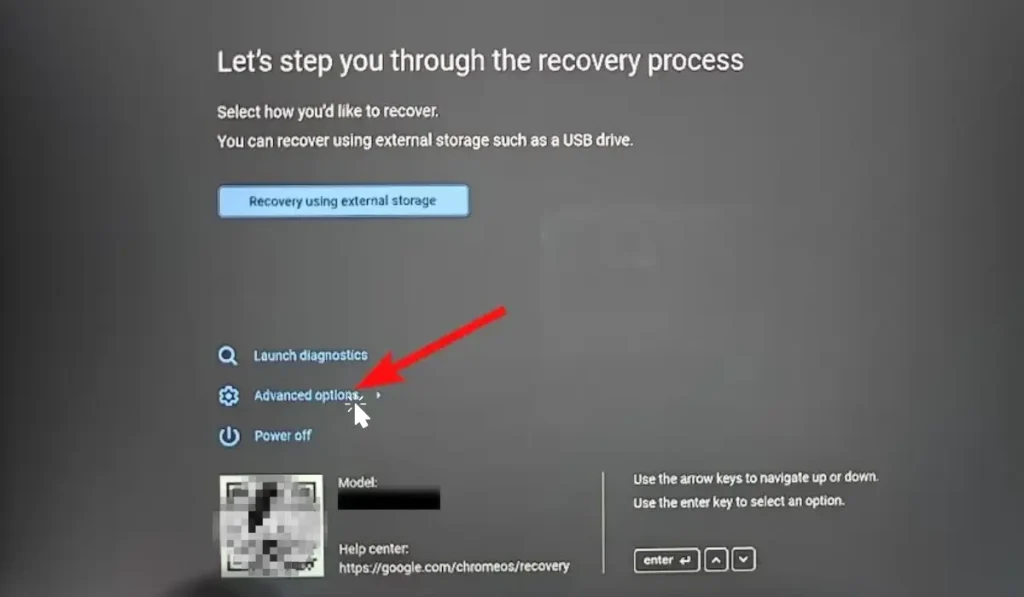
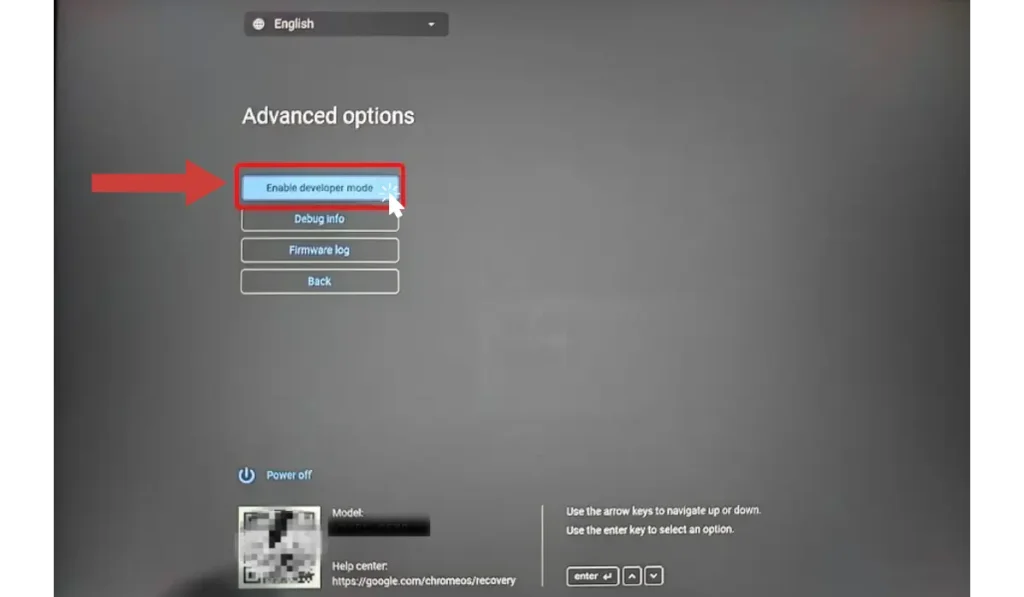
2. Once you’re in Advanced options, pick Enable Developer Mode and press Enter to confirm.
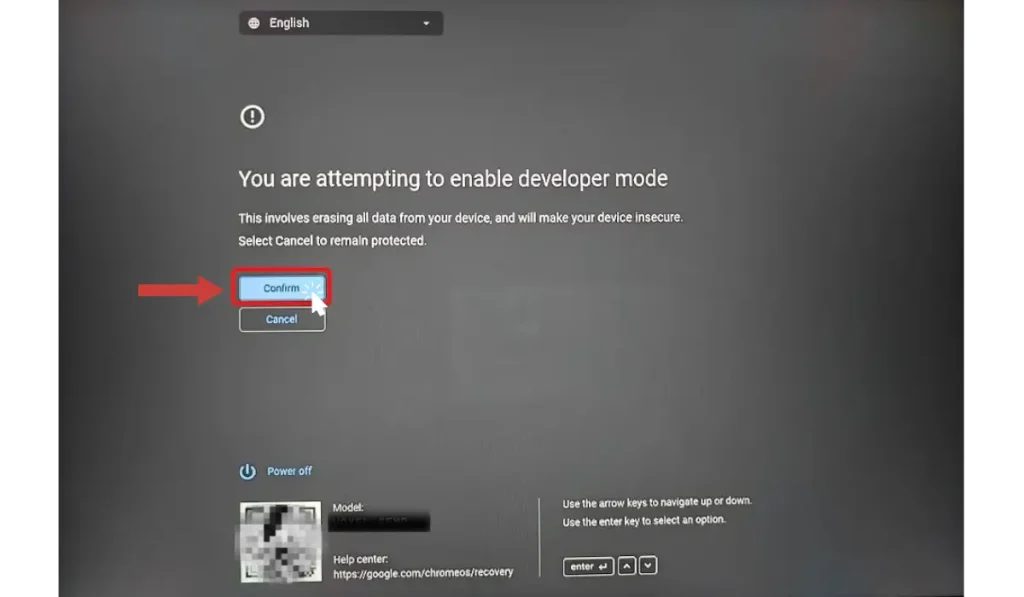
3. Next, you’ll need to confirm enabling Developer Mode. Select Confirm and press Enter.
4. Press the down arrow to select Boot from internal disk, then hit Enter.
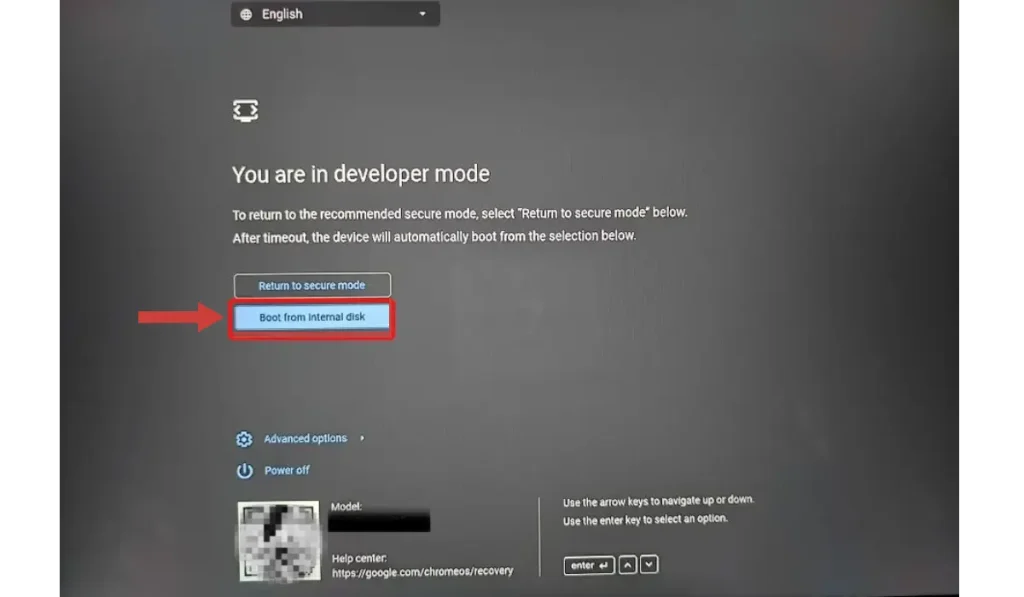
5. Your Chromebook will reboot, wipe itself, and then display a screen stating ‘You are in Developer Mode
How to Disable Developer Mode on a Chromebook
If you’ve been using Developer Mode and want to turn it off, the process is simple but will also reset your Chromebook and erase all data. Here’s what to do:
Step 1: Back Up Your Data
- Save any important files to Google Drive or an external device.
Step 2: Enter Recovery Mode
- Turn off the Chromebook.
- Press and hold Esc + Refresh and press the Power button to enter Recovery Mode.
Step 3: Disable Developer Mode
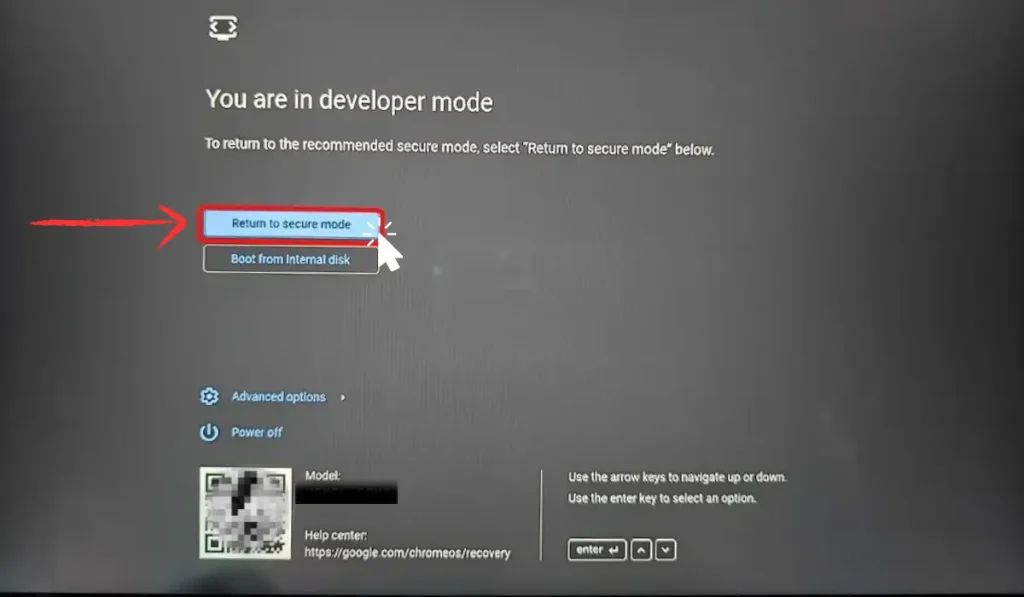
- Turn on your Chromebook and wait until the ‘You are in Developer Mode’ screen appears.
- Press the arrow keys to highlight Return to secure mode, then hit Enter.
- Using the arrow keys, select Confirm, then press Enter to continue.
- Your Chromebook will restart and should boot back into ChromeOS shortly.
Step 4: Set Up Your Chromebook
After disabling Developer Mode, your Chromebook will restart and return to its factory settings. You’ll need to go through the initial setup, including signing in with your Google account and restoring any backed-up data.
Conclusion
Enabling or disabling Chrome OS Developer Mode depends on your needs. If you’re a developer or tech-savvy user, it can offer some great features, but for everyday use, it’s best to leave Developer Mode off for added security. Remember, both processes will wipe your Chromebook, so always back up your data before making any changes.
Have you tried using Developer Mode on your Chromebook? Share your experience in the comments below! If you found this guide helpful, be sure to share it with others who may be curious about enabling or disabling Developer Mode.