Recording full screen video is a helpful tool, whether you’re creating tutorials, capturing gameplay, or recording presentations. Fortunately, both Windows and macOS offer a variety of options to make this task simple and effective.
In this article, we’ll walk you through how to record full screen video on Windows 10 & 11 and Mac, using built-in tools and some handy third-party software options.
How to Record Full Screen Video on Windows 10 & 11
1. Using the Built-in Game Bar
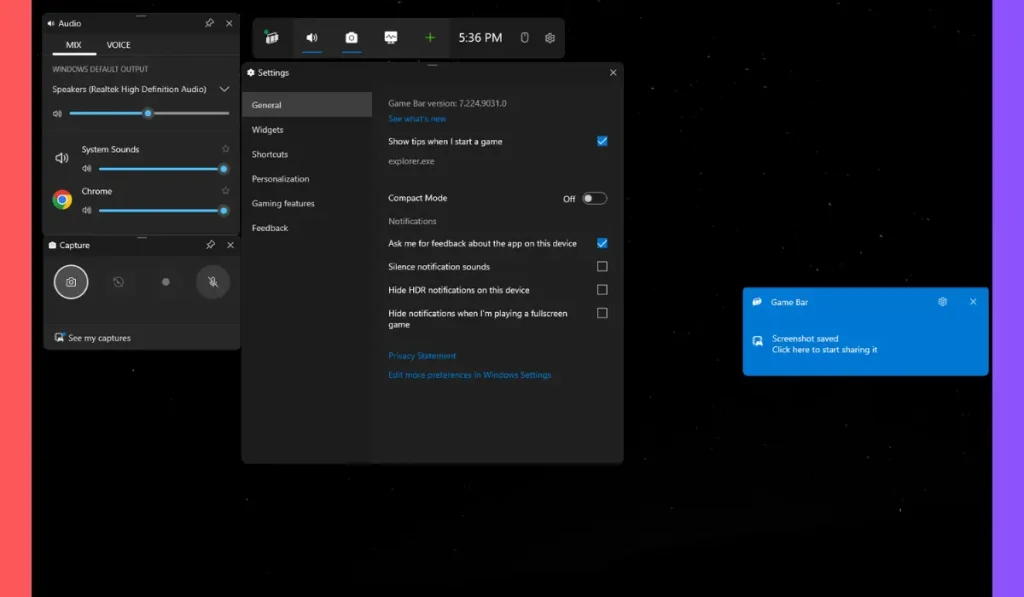
Windows 10 & 11 come with a built-in tool called the Xbox Game Bar. Although it’s primarily designed for gaming, it can also be used for full screen recording:
- Press Windows + G to open the Game Bar overlay.
- Click the Record button or press Windows + Alt + R to start recording your screen.
- To stop recording, press Windows + Alt + R again or click the stop button.
- Your video will be saved in the Captures folder under Videos.
This method is great for simple tasks, but if you need more control over your recording, check out other options below.
2. Using OBS Studio
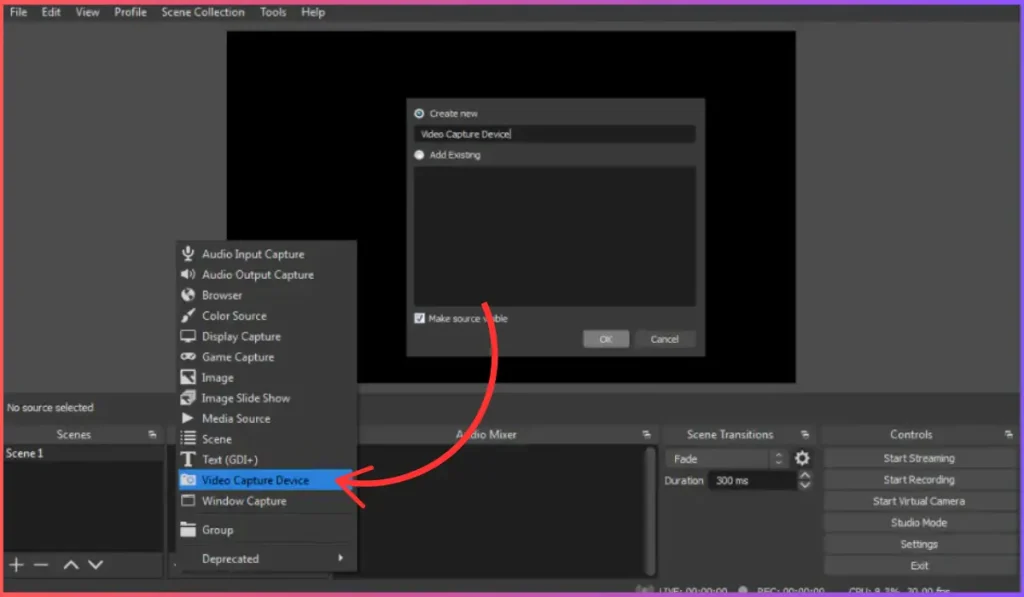
OBS Studio is a free and open-source tool used for screen recording and streaming. It’s widely popular for capturing gameplay, but it’s also excellent for recording any full screen activity:
- Download OBS Studio from its official website.
- Open OBS, and under the Sources tab, click the + button.
- Select Display Capture and choose the monitor you wish to record.
- Once set up, press Start Recording to begin.
- When done, press Stop Recording.
OBS Studio offers advanced settings, allowing you to adjust resolution, frame rate, and audio options, making it ideal for high-quality recordings.
3. Using Snipping Tool (Windows 11)
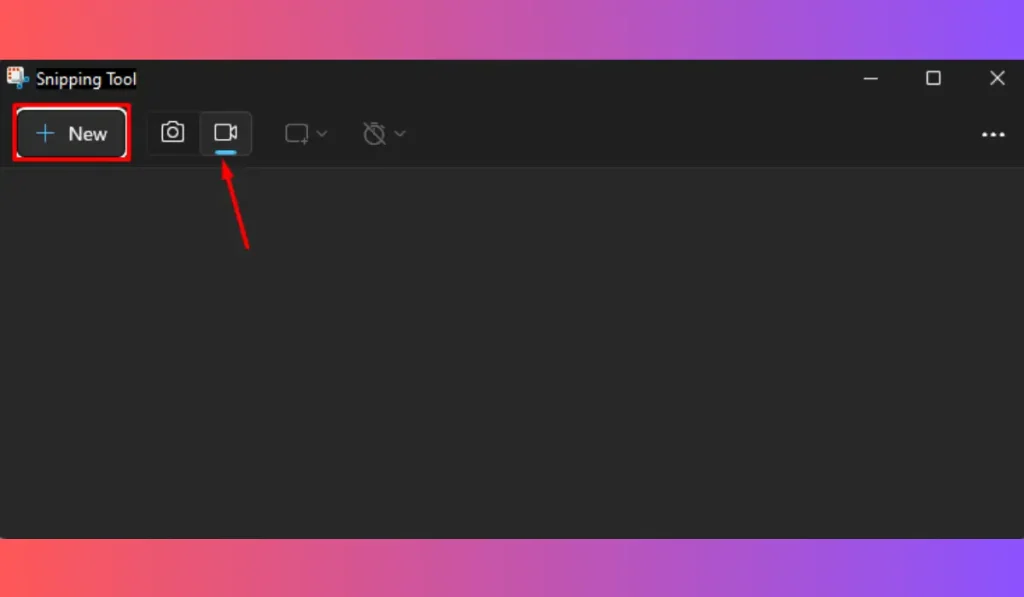
The Snipping Tool in Windows 11 has been updated to allow screen recording, making it one of the easiest methods for capturing video:
- Open the Snipping Tool from the Start menu.
- Click the Record icon at the top.
- Select the area you wish to record (or select Full Screen).
- Click Start Recording and, when finished, press Stop.
- Your recording will automatically save to your designated folder.
This is a quick and user-friendly option for basic screen recording needs.
4. Using PowerPoint
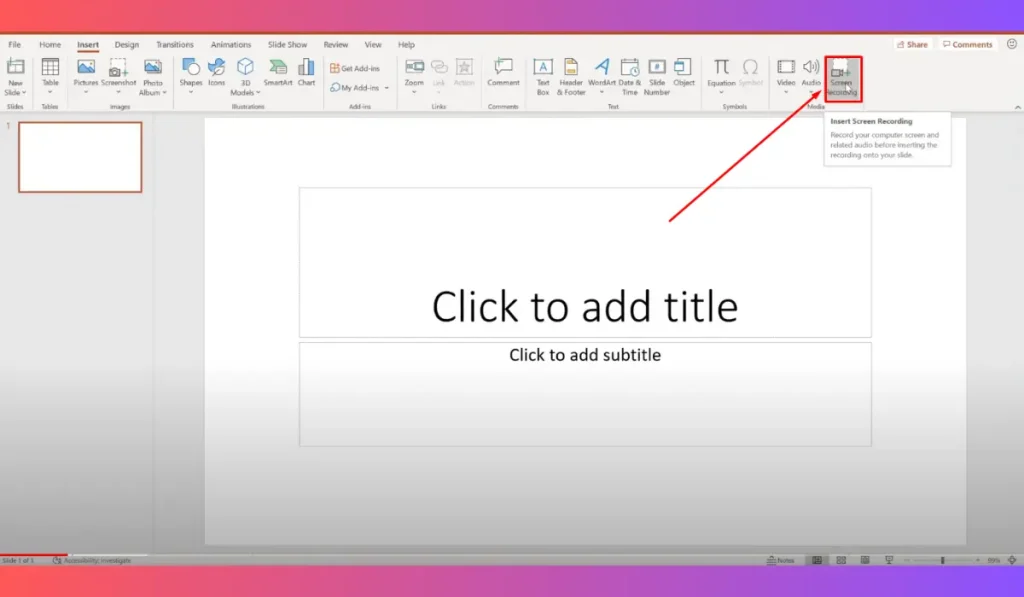
Microsoft PowerPoint includes a screen recording feature that’s easy to use for capturing your entire display.
How to Use:
- Open PowerPoint, go to Insert > Screen Recording.
- Select Full Screen for the recording area.
- Press Record to capture your screen.
- When finished, stop the recording and save the video.
This is an excellent option if you need to incorporate your recordings into presentations or other documents.
How to Record Full Screen Video on macOS
1. Using macOS Built-in Screen Recorder
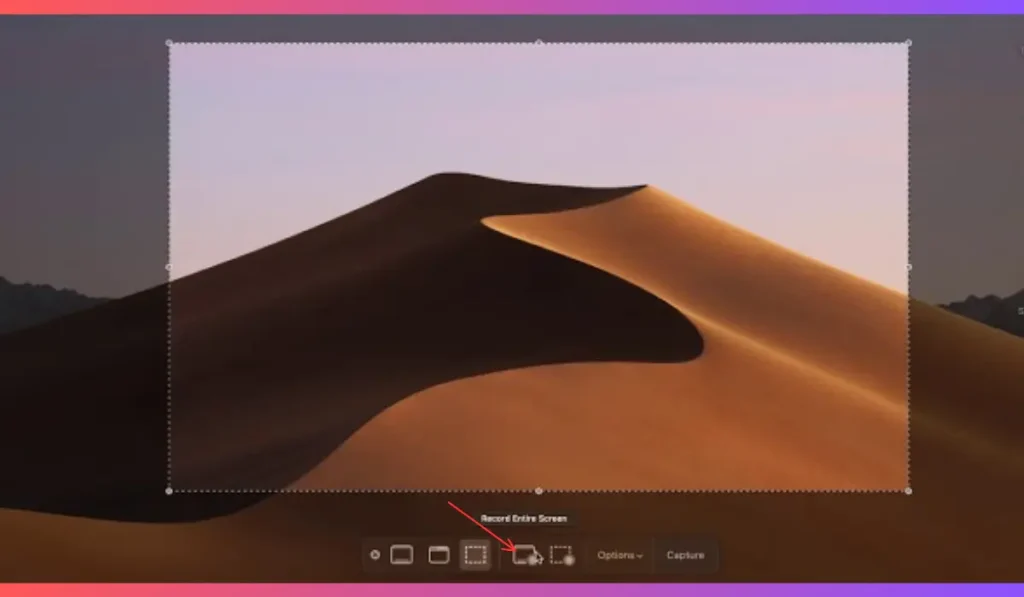
macOS Mojave and later versions have a built-in screen recording tool that’s easy to use and offers full screen recording:
- Press Command + Shift + 5 to open the screen recording toolbar.
- Choose the Full Screen recording option.
- Click Record to start, and stop the recording using the stop button in the menu bar.
- The recording will be saved to your desktop by default.
This method is perfect for macOS users who need a quick and simple solution for full screen recording.
2. Using QuickTime Player
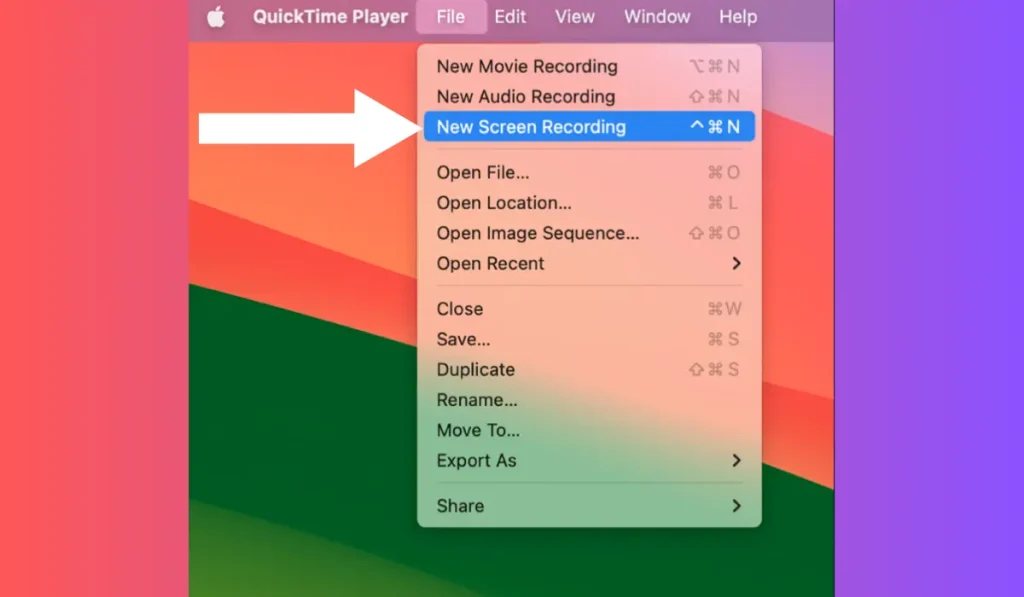
QuickTime Player is another built-in app on macOS that allows you to record your full screen with ease:
- Open QuickTime Player and go to File > New Screen Recording.
- Click the red record button and select the full screen option.
- Once you’ve recorded, press Stop and save the video.
QuickTime is especially useful for those who prefer an intuitive, native app for their screen recording needs.
3. Using OBS Studio on macOS
Like on Windows, OBS Studio is available for macOS and offers advanced settings for full screen recording:
- Download and install OBS Studio from the official website.
- Add a Display Capture under the Sources tab.
- Select the full screen you want to record.
- Press Start Recording and stop when finished.
OBS is a versatile option for users who need control over their recording quality and settings.
Best Practices for Recording Full Screen Videos
- Resolution and Frame Rate: Set your resolution to match your screen size, and select a frame rate (30fps or 60fps) based on your needs.
- Audio Settings: Be sure to configure your audio to record system sound, microphone input, or both.
- Storage: Make sure your device has enough storage for large video files.
- Test Recording: Always run a quick test recording to ensure everything works smoothly before starting your full session.
Conclusion
Whether you’re on Windows 10 & 11 or macOS, recording full screen videos is simple and effective using built-in tools like the Game Bar, QuickTime Player, or Snipping Tool. For more advanced options, OBS Studio offers a powerful and customizable experience.
Try these methods today, and let us know which one worked best for you! Don’t forget to share this guide with anyone who might need help recording their screen.