In today’s fast-paced world, sending emails at the right time is crucial for productivity and communication. Whether you’re managing communication across different time zones or trying to send an email during optimal working hours, scheduling emails can help. Microsoft Outlook provides an easy way to schedule emails, allowing you to plan your communications without distractions.
In this guide, we’ll walk you through the steps to schedule an email in Outlook, so you can send messages at the perfect time.
How to Schedule an Email in Outlook
Step-by-Step to schedule an email in Outlook:
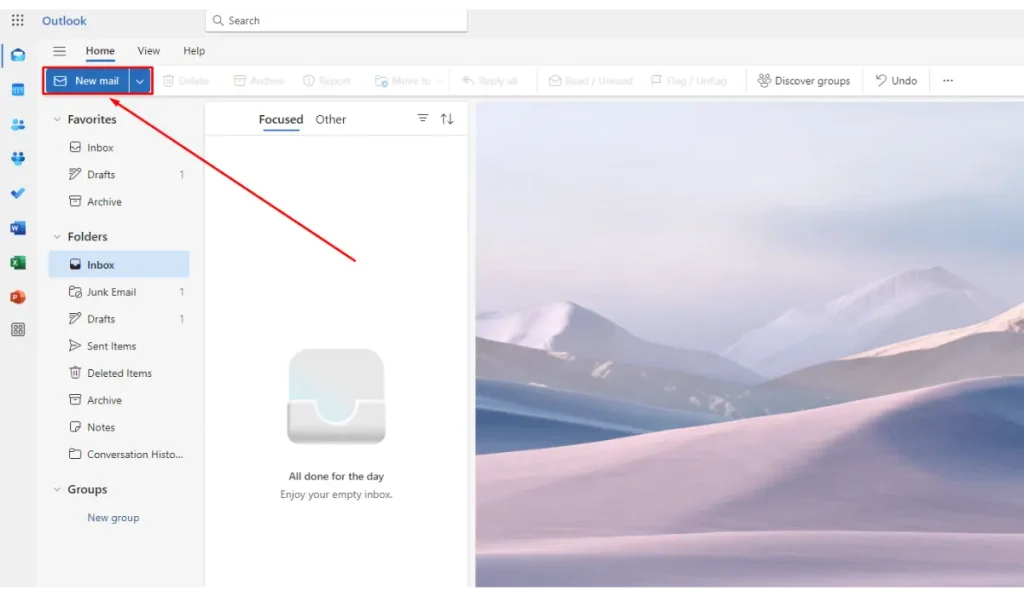
1. Open a New Email or Reply to an Existing One

Start by opening a new email or replying to an email that you have already received.
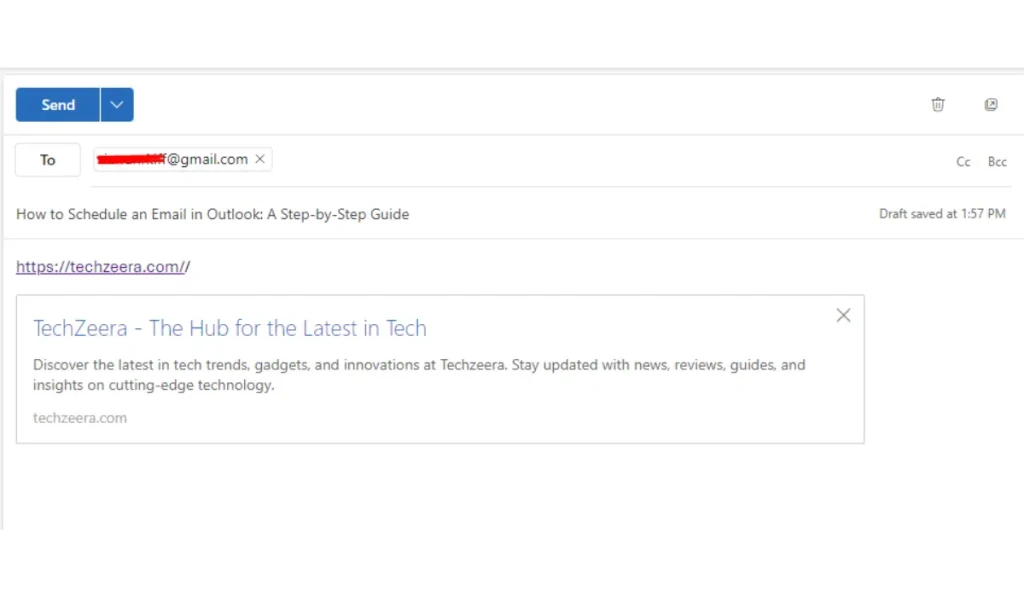
2. Compose Your Email

Write your email as you normally would, including the subject, message body, and any necessary attachments.
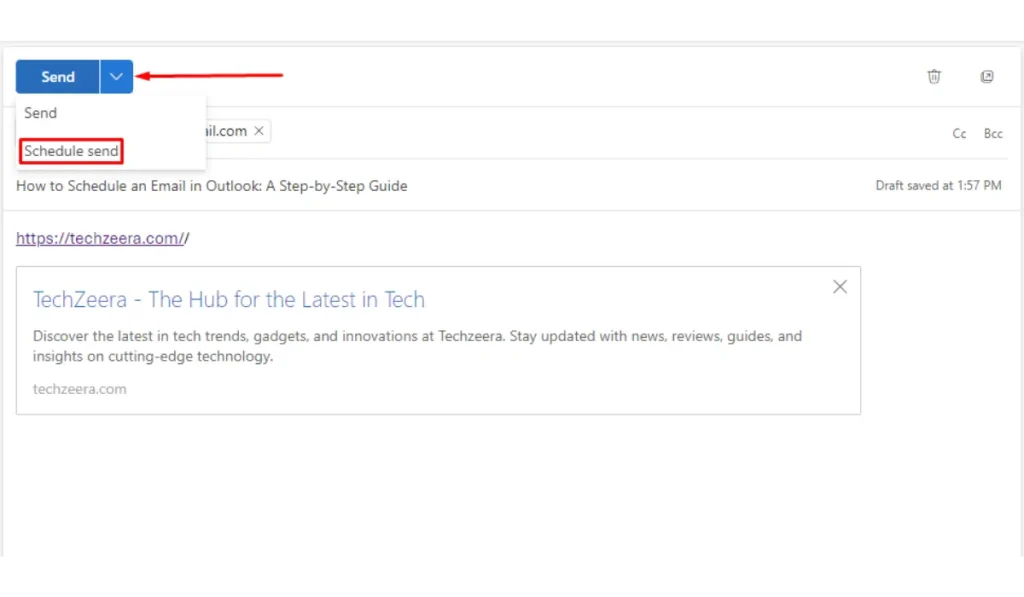
3. Click on the Options Tab and Select ‘Schedule Send’

Look for the ‘Send’ dropdown arrow in the email window as shown in the screenshot. This is typically located in the upper left corner of your message window. Then, from the dropdown options under ‘Send’, choose ‘Schedule Send’. This will open a new prompt showing different scheduling options.
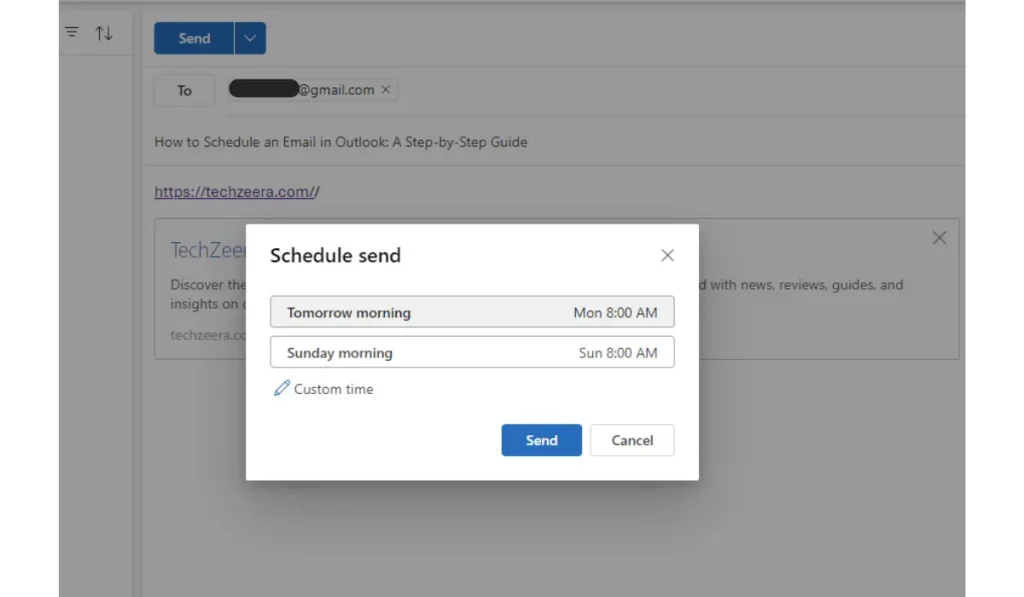
4. Choose the Desired Date and Time

A box will appear where you can choose when to send the email. You can pick options like “Tomorrow morning” or select ‘Custom Time‘ to choose a specific date and time.
6. Click Send
Once you’re satisfied with the email and its scheduled time, click Send. The email will be stored in your Outbox until it is automatically delivered at the scheduled time.
7. Verify Email is Scheduled
Your email will now be located in the ‘Outbox’ until its scheduled sending time. You can check here if you wish to review or modify the email before it is sent.
Additional Tips and Considerations
- Editing or Canceling a Scheduled Email: If you need to change or cancel a scheduled email, go to your Outbox, open the email, and either edit it or cancel the schedule.
- Locating Scheduled Emails: All scheduled emails sit in the Outbox until the scheduled time. You can go there to manage or review them.
- Using Scheduling on Mobile: Outlook mobile apps also allow you to schedule emails, though the steps may vary slightly.
- Benefits of Scheduling Emails: Scheduling emails lets you manage your time better, maintain consistent communication, and ensure important emails are sent at the best time.
Conclusion
Scheduling an email in Outlook is a quick and easy way to make sure your messages are sent at the perfect time. Whether you’re managing communication across different time zones, planning ahead, or simply optimizing your workflow, this feature helps you stay organized and efficient. By following the simple steps we’ve outlined, you can schedule emails with ease and take control of your inbox.
Ready to try it for yourself? Use Outlook’s scheduling feature today and see how it improves your email productivity. If you have any questions or tips, feel free to share them in the comments below!
FAQs about Scheduling Mail in Outlook
Yes, you can. Simply go to the Outbox, open the scheduled email, make the necessary changes, and click Send again. The email will still be sent at the scheduled time.
Scheduled emails are stored in the Outbox until the time they are set to be sent. You can open the Outbox folder to view, edit, or cancel scheduled emails.
Yes, you can cancel it by opening the email in the Outbox and deleting it before the scheduled time.
Yes, Outlook’s mobile app also allows you to schedule emails, although the steps may differ slightly from the desktop version.
If Outlook is closed, the email won’t be sent until the app is reopened. Make sure Outlook is running at the scheduled time for the email to be sent.
Outlook doesn’t have a built-in feature to schedule recurring emails directly, but you can use templates and reminders to manually resend scheduled emails.