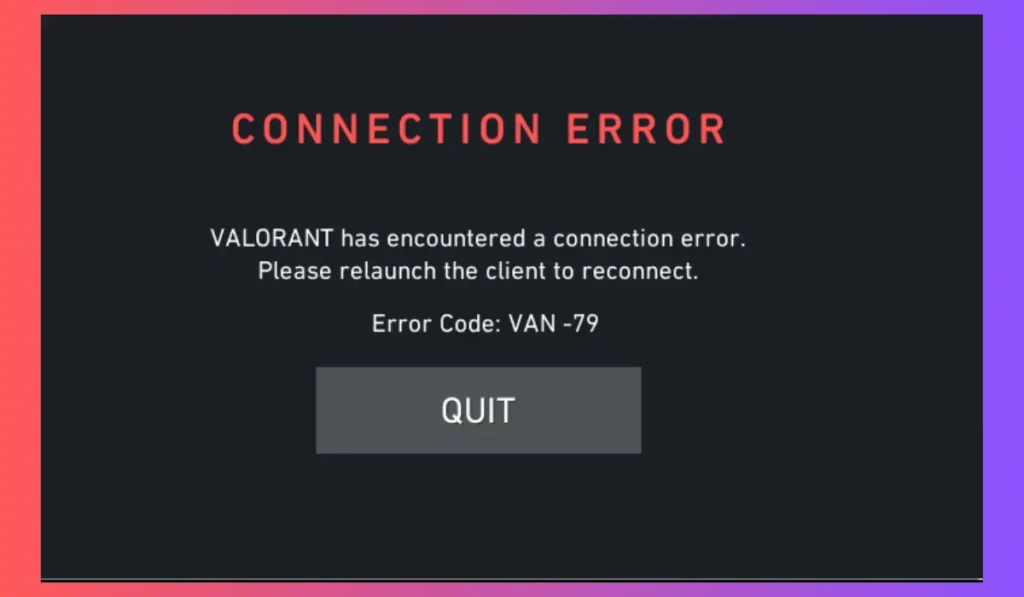
Are you facing Error Code VAN 79 while playing Valorant? This error can be frustrating, especially when you’re in the mood for some fast-paced gameplay. But don’t worry! There are several ways to troubleshoot and resolve this issue. In this guide, we’ll walk you through why VAN 79 appears and how to fix it step by step.
What Is Valorant Error Code VAN 79?

Error Code VAN 79 in Valorant occurs when there’s an issue with Vanguard, the game’s anti-cheat system, or conflicts with your system settings, such as outdated drivers or network issues. The error stops you from launching the game and keeps you from jumping into matches.
Common Causes of Valorant Error Code VAN 79
1. Vanguard Anti-Cheat System Issues
Valorant uses Vanguard, an anti-cheat system that runs in the background to prevent cheating. Sometimes, if Vanguard doesn’t load correctly or gets corrupted, Error VAN 79 can appear.
2. Outdated or Corrupted Drivers
If your computer’s graphics or network drivers are outdated or corrupted, Valorant might struggle to run smoothly and trigger this error.
3. Firewall or Antivirus Conflicts
Your firewall or antivirus software may block parts of the game or its anti-cheat system, causing Error VAN 79.
4. Internet Connection Problems
An unstable or slow internet connection can also trigger VAN 79. If your connection drops frequently, or the game is unable to communicate with Riot’s servers, this error might appear.
How to Fix Valorant Error Code VAN 79
Here are several steps you can take to fix Error VAN 79 and get back to playing Valorant.
1. Restart Your PC and Game
A simple restart can solve many temporary issues, including those that cause Error VAN 79:
- Close Valorant completely by ensuring it’s not running in the background.
- Restart your computer to refresh your system’s settings and resolve temporary issues.
- After restarting, relaunch Valorant and check if the error persists.
Restarting the game and your PC helps clear out any temporary conflicts that might be causing Vanguard to malfunction. It’s a quick and easy first step before moving to more complex solutions.
2. Update or Reinstall Vanguard Anti-Cheat
Vanguard is crucial to Valorant, and if it’s not functioning properly, VAN 79 will pop up. Updating or reinstalling Vanguard can help resolve the issue.
- Steps:
- Open the Control Panel on your PC.
- Go to Programs and Features and locate Riot Vanguard.
- Right-click and select Uninstall.
- Restart your computer.
- Launch Valorant, and the game will prompt you to reinstall Vanguard automatically.
- Follow the on-screen instructions to complete the installation.
- Once Vanguard is installed, restart your PC and try launching the game again.
This will ensure you’re running the latest version of Vanguard, fixing any corrupt files or failed updates.
3. Update Your Network and Graphics Drivers
Drivers are essential for your system to communicate with the game. Outdated or corrupted drivers can interfere with Valorant, leading to errors like VAN 79. Updating these drivers ensures your system can handle the game properly:
- Press Windows + X and select Device Manager.
- Look for Network Adapters and Display Adapters in the list.
- Right-click each adapter and select Update Driver.
- Choose Search automatically for updated driver software.
- Allow the system to find and install the latest drivers.
- Restart your PC to apply the changes.
You can also visit your device manufacturer’s website (NVIDIA, AMD, etc.) to manually download and install the latest drivers if needed. Keeping your drivers updated will reduce the chances of encountering similar errors.
4. Disable Firewall or Antivirus Temporarily
Your firewall or antivirus software might block Valorant or Vanguard, thinking it’s a potential threat. Temporarily disabling these programs or adding exceptions for Vanguard and Valorant can help:
- Open Windows Security by searching for it in the Start menu.
- Go to Firewall & Network Protection.
- Click Allow an app through firewall and scroll down to find Vanguard and Valorant.
- Make sure both are checked for Public and Private networks.
- If you use a third-party antivirus, open its settings and look for similar options to allow Vanguard and Valorant through.
- Restart your PC and try launching Valorant again.
Disabling the firewall temporarily or adding the necessary exceptions ensures that the game has full access to the network and won’t be blocked by security programs.
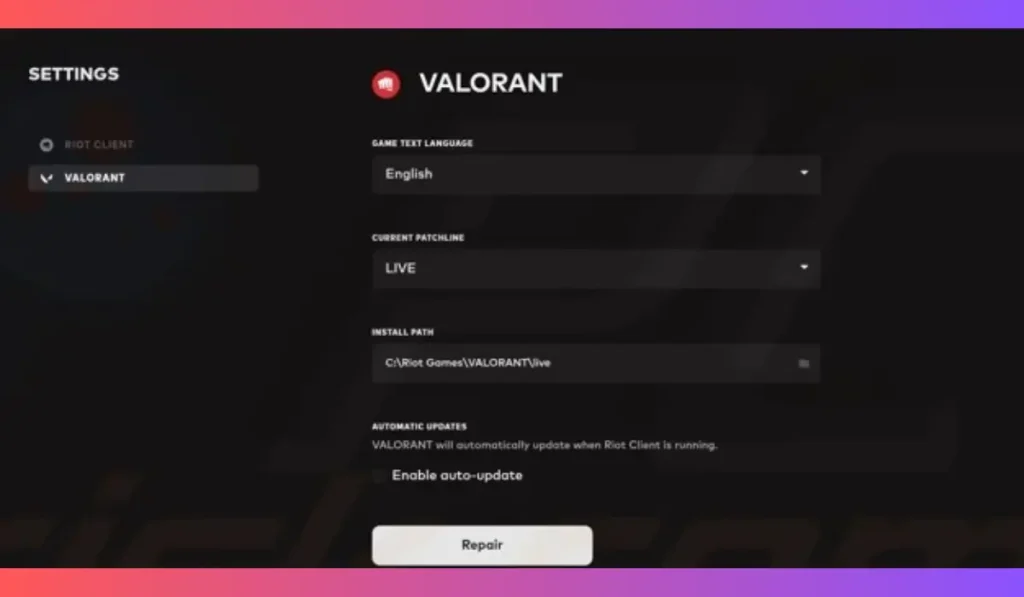
5. Verify the Game Files in Riot Client

Sometimes, Valorant’s game files can become corrupted or incomplete, causing errors like VAN 79. Verifying the game files checks for missing or damaged files and replaces them:
- Open the Riot Client.
- Click on Valorant in your game library.
- Select Settings (the gear icon) and click Verify Game Files.
- The client will check for any missing or corrupted files and fix them automatically.
- Once the verification is complete, restart your PC and launch the game again.
Verifying game files can quickly fix any issues caused by corrupted or missing files.
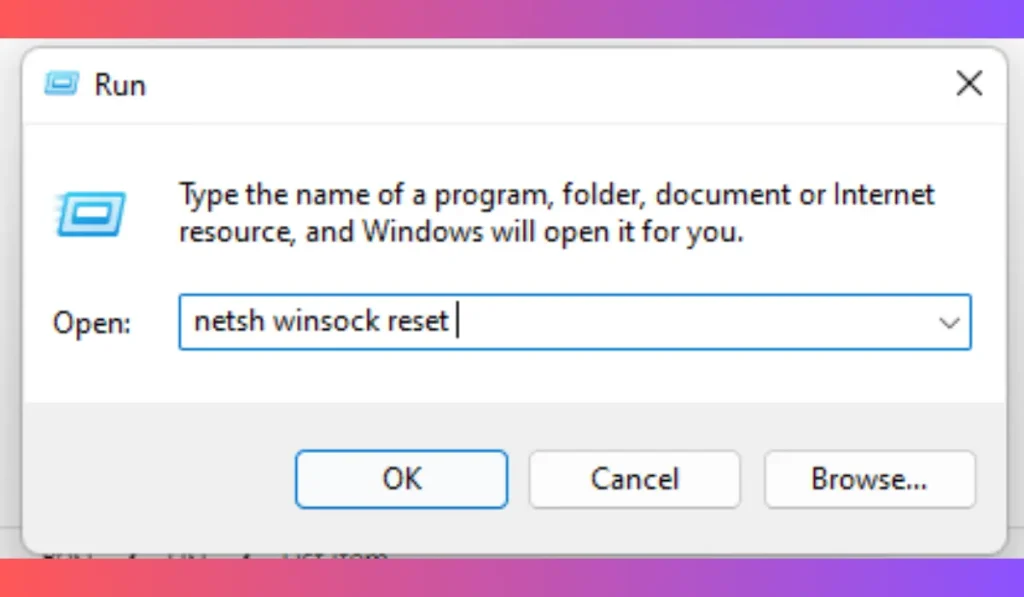
6. Reset Your Network Settings

If the error is related to your network, resetting your network settings can fix issues that might be blocking Valorant:
- Press Windows + R, type cmd, and press Enter.
- In the command prompt, type netsh winsock reset and press Enter.
- Close the command prompt and restart your PC.
- After the restart, try launching Valorant to see if the error is resolved.
Resetting your network settings refreshes your connection and fixes any issues with blocked ports or corrupted network configurations.
If none of the above solutions work, it might be time to contact Riot Support. Provide details like the error code and steps you’ve already tried, and they can help troubleshoot further.
Conclusion
Valorant Error Code VAN 79 can be annoying, but it’s usually easy to fix. By following the steps outlined above—restarting your PC, updating drivers, or checking your firewall—you can get back into the game quickly. If the problem persists, reaching out to Riot Support is the best option.
Have you encountered Error Code VAN 79? Share your experience or any other troubleshooting tips in the comments below! And don’t forget to share this guide with your friends who might be experiencing the same issue.